Saturday, October 6, 2012

{Day 6: A Lovely Little Laundry Room}

The shelf over the washer & dryer, and a glimpse of the
re-organized battery/light bulb cabinet.
I spent an extraordinary amount of time in the laundry room today. Besides catching up on the family's wash for the week I did a deep clean and re-organized two cabinets and the linen closet. We also moved around some hooks for big impact!

A "before" shot of the shelf over the washer & dryer. The cleaners
have all been moved to one of the cabinets now.

I pulled some cute canisters from storage and put them on the shelf with my iPod
and a digital picture frame. This one will hold samples and the other has dryer sheets.
I removed a shelf in one of the cabinets over the washer & dryer
so I could fit the bleach, stain treatment, etc. behind closed doors.

I organized another cabinet by sorting the elements and
putting them in handy little containers. Light bulbs here.
Batteries here.


This is the "before" of the battery and light bulb cabinet.

A detailed "before" shot of the linen closet. All that stuff is now
stored in coordinating file boxes that were $2 each from Michael's.
  
After.
The towels are folded and sorted on the bottom shelf.
Sheets are stacked neatly; the basket holds extra pillow cases.
And the top shelf has a basket of SPF and stacked beach towels.
The $2 file boxes that now house cleaning supplies, pet grooming
equipment, extra toiletries, and first aid items.

We moved this coat hook from the entryway. The room is not truly done
because we still need to paint: note the paint swatches above the hooks.
I really like how it looks hung so high and it won't interfere with sitting on the bench (out of sight).

I moved the bottom row of pictures up and Phil
sweetly hung the hooks for me.

Here is Griff's Monet art that was tilted on another wall before.

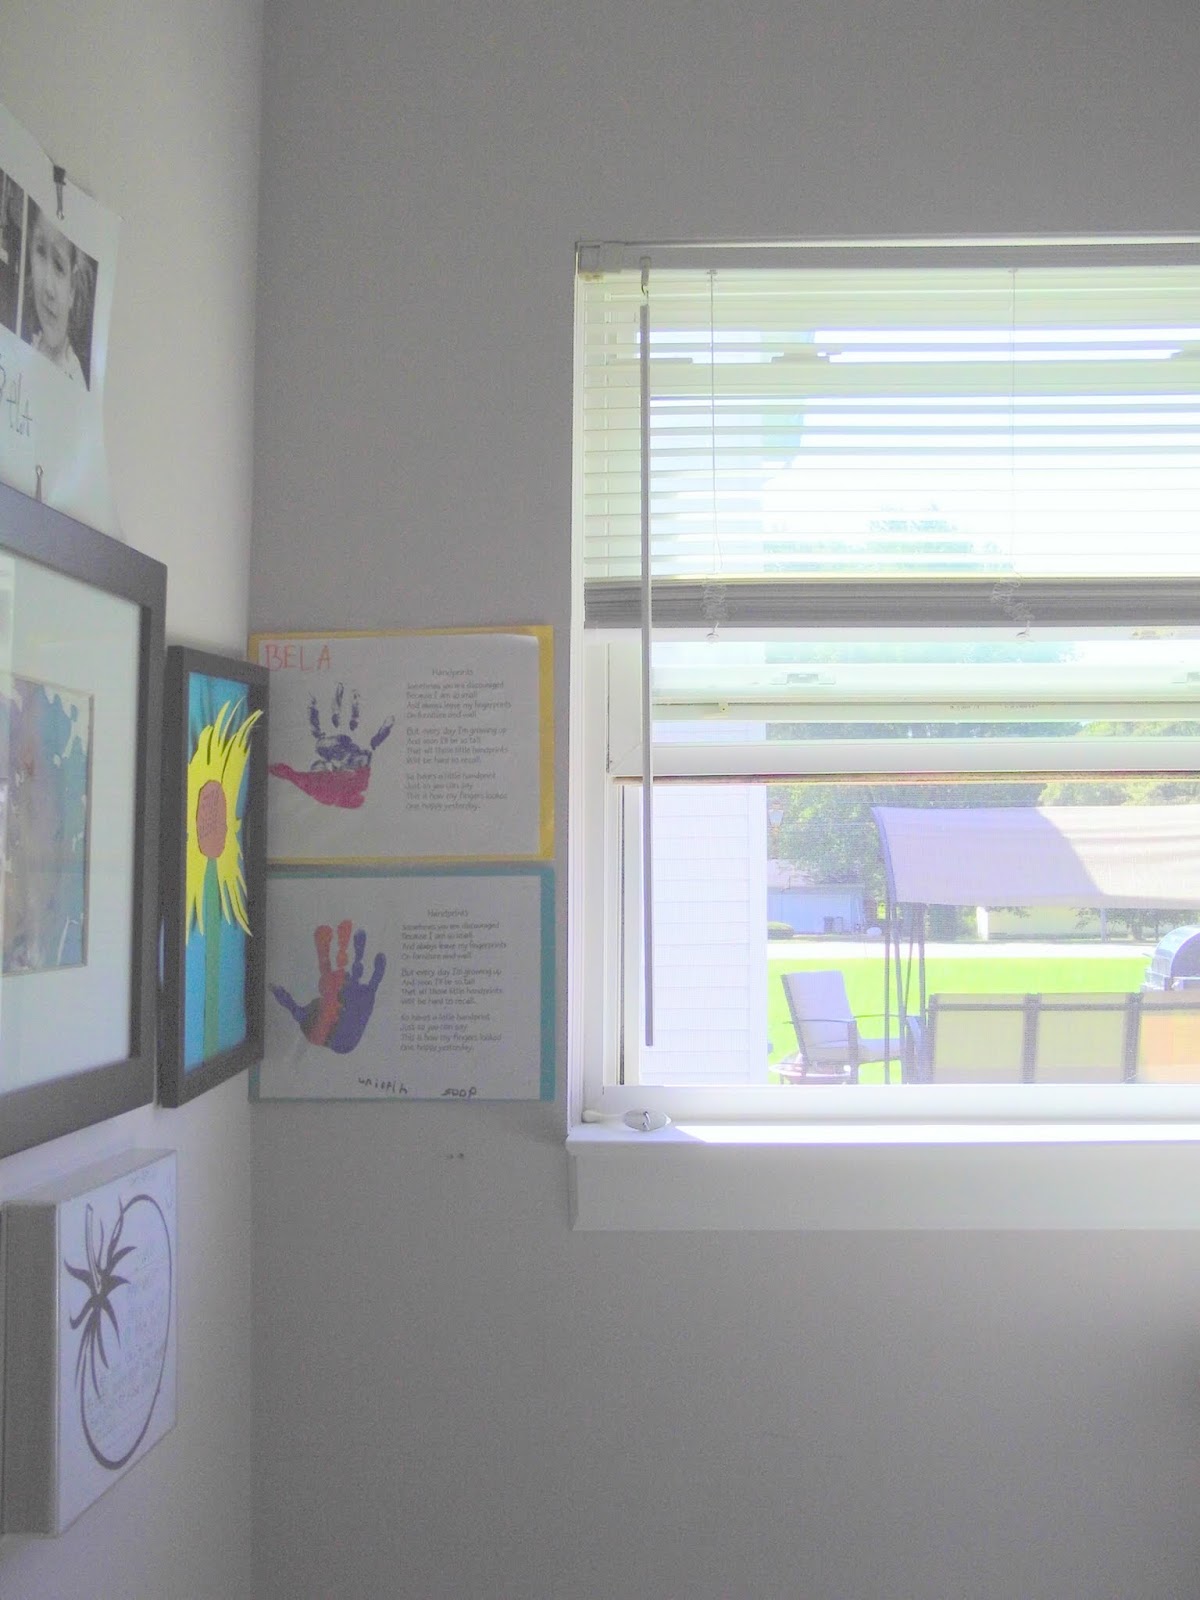
Phil also hung these hooks under the window near the dryer.
I am so happy that I have a place for hangers!
A sampling of the cleaners I used to get rid of all the dust bunnies.


An "after" shot of the laundry room.
The room is so teensy it's hard to get a good pic.
Now it's time to celebrate with baseball and apple pie (and a heating pad). Tomorrow we'll be on to a new area of the house to continue "31 Days to Lovely Little Spaces."

Friday, October 5, 2012

{Day 5: The Other Entry}

One of the blogs I follow is The Inspired Room and this week it's author, Melissa, wrote a beautiful essay about creating a welcoming entry. To quote a line from the post, "It is a labor of love to create a space where people want to gather." I love how she keeps the focus on what we want the space we are decorating to convey--and yet still makes things look so pretty!

Our empty entry.
Since my lovely little spaces are focused on homecomings this week, I thought I'd jump over to the other entry point to our home: the front door. And since Friday is shopping day here at Cosy Carolina, and The Inspired Room is curating a wonderful little sale on Joss & Main, I thought I'd pick out some things I'd like to see in our entry.


Mirrors are always nice to have but a mirror in the foyer or entry is great so you can catch one last glimpse of yourself before you head out the door. Two choices I like from the sale are this rectangular gold-trimmed mirror and the dark wood porthole mirror. Both are out of my price range, so I'll have to look for something similar elsewhere.

Howard Elliott Nancy Wall Mirror $313.95
Howard Elliott Lucas Wall Mirror $313.95
Looking up, there is a light fixture commonly referred to as a "boob" light. Switching it out with anything would be an improvement. Since the wall is angled, I prefer a hanging light, and this one from the sale is quite cute.
Kichler Seaside Pendant $113.95
I love the colors of this wreath, and if it weren't sold out and I felt like splurging, I would hang it on the inside of our front door. Always a good reminder with these flash sales: if you see something you like, snap it up quick or somebody else will! 
Regal Peacock Wreath $109.95
Finally a place to set things down as you come in the door--a table. I'm not sure if I would place this against the wall or behind the sofa in our house. I love the x-detail on the sides and can imagine some baskets on those shelves. The color would have to be changed for our house, either to a dark stain like the bigger pieces in our living room/dining room or white to balance all those other dark pieces. I like the versatility of it, though, and it's a great price.

Hampton Console Table $167.95
I'll be back in our laundry room for tomorrow's post to (hopefully) finish it off! Until then, here are some fun porches decorated for Halloween for you to enjoy and be inspired by!

Thursday, October 4, 2012

{Day 4: How to Make a Gallery Wall}

The gallery wall in the laundry room/mudroom is one of my favorite lovely little spaces. It truly makes me smile every time I look at it.

Gallery of kid art in my laundry room/mudroom
To make the gallery wall, I pulled out all of the drawings, paintings, etc. that Griffin and Bela had made over the past few years. I had been saving all of my favorites in a Rubbermaid container in our basement. They're really creative and always so proud of their artwork; I really wanted a way to show it off. Plus, it was free!
  
Here are the artists on the first day of school this year. 

Griffin, 4th grade. Bela, 1st grade.
You don't need to have your own little artists in residence, though, to create a gallery wall. Other options are family photos, travel pictures, or inspiring quotations. Whatever makes you smile! I even think an entire gallery of different shots of a beloved pet would be super cute. No matter what you choose, make sure your grouping has a similar theme. The subject elements should relate to each other to create consistency.

Angled view of the gallery wall. The bad reflection on the glass is
all the better for showing off the frames.
The other way to create a consistent look is in your choice of frames. Most of the frames I used in this project are cheapies. I really like the thin black gallery frame style that is sold at the Dollar Store and Wal-Mart. The pop-out glass makes them super easy to use and they usually only cost $1-2 for an 8x10. I am also a big fan of the edgeless cube-style frame (bottom, b&w tomato). I even used one frame that didn't have any glass (the handprint sunflower in the corner) which creates a cool 3-D effect! In the end, I didn't want the frames overpowering the art.

The thicker black frame in the center with the white matting is the exception. I bought it several years ago from Target and I think I spent about $25. Using one nicer frame in your gallery is a good trick for elevating the whole. As your eye travels around the gallery, your brain only needs to see one or two nice frames amidst the collection of images, which is where you want the focus to be.

Here's another shot of the gallery wall from around the corner.   

I really need to put the photo collage of Griff & Bela into a frame!

There's still lots of room between the top row of art and the ceiling, which means we can go higher when we need to add more pieces. 

Lots of people recommend laying all of your frames on a large piece of craft paper and then putting that up to get your configuration just right. I am not one of those people. My preference is to align the tops of the frames (or the bottoms of the frames in some cases) with the key being to make an equivalent distance between the frames. So in some cases, such as the labeled flower on yellow, a frame will not be level with any of the other pictures but it will be an equivalent distance from the print above and the one next to it.

The hardware on the Monet-esque piece makes the frame tilt.
Drives me crazy! I'll be fixing it this week.
I hung the Monet-inspired watercolor a little lower to accommodate the coat hooks. Once the hooks move, I can move it up and add another frame or two below.

The coat hooks are moving over here this week.
The prints will have to move up a bit first, though.
Here's another grouping of the kids' art on a different wall in the same room. It could be considered a mini gallery. The dragon on top and the dragon on the bottom were projects both kids did in kindergarten. The blue background on the owl ties in with the blue of the pussy willow picture. By displaying the pieces this way (in a crosswise X pattern) you pull the eye around the arrangement. Those also happen to be the "colors" in the decor scheme of our house.

****
Finally, a craft project for preserving some happy memories of childhood!

Griff and Bela made these handprint poems at the end of kindergarten. They are so lovely! 
To do it at home, print the poem onto paper first, mix up the finger paints and let your baby roll their little hand in it, then place their hand onto the paper. Mount on construction paper.


If you would like a copy of the poem--ready to print--just let me know in the comments section and I'll send it to you by email. :)  It's really touching and such a good reminder for parents to appreciate now, even with all the little messes.

Wednesday, October 3, 2012

{Day 3: Lovely Laundry}


A few elements I would use to make my laundry room prettier...

1. This colorful rug would be perfect in front of the washer & dryer; I would also purchase the same print in a smaller size for the area between the two doors. Even though it means the pattern will be going in the opposite direction, it's best to keep the same pattern. Especially since I have plans to introduce more color and pattern elsewhere in this space. 

The runner is 2'3 x 7'6 and smaller rug is 1'9 by 3'9. Both are from Home Decorator's Collection and would ship free until 10/22. The total cost for BOTH rugs then is only $68. Partly because of the material, which is a synthetic suitable for outdoor use. Perfect for a laundry room!


2. On the window, I would hang a fabric shade with this fun pattern from Fabric.com. It's a small window so I don't think I would need more than a yard--unless I decided to make a few pillows for the bench. It costs $7.48 per yard. I think it coordinates nicely with the rug and the kids' art.


3. I would add a counter to the top of the washer & dryer. I'm quite sure that I saw a marble one (imitation, for sure!) at IKEA the last time I was there. It's not available on the website, but I did find this plain jane white substitute for only $39.


Source
 4. I am enamored with this photo of a laundry room from Southern Living. I think it would be pretty easy to replicate the "legs" underneath the counter and would make the whole thing look custom-made. It also leads me to wonder about paint...

5. Besides painting the walls, we can change the look of our laundry room/mudroom by painting the cabinets above the washer & dryer and paint the steel door to the garage. Sherwin Williams is running a 40% off promo right now so this might be a good time to make some changes!

Jones Design Company

Choosing the right color tends to stump me, though. I don't want anything too colorful since we've already got loads of color with the rug, window treatment, and kids' art. I love the white used in the mudroom above, but I know that we're going to get scuff marks and I don't relish the idea of lots of touch-ups. (I do really love the beadboard they've used on the lower part of the wall here, though. Brilliant!)


The Mindful Nest


Another fun idea to copy would be this chalkboard wall. It would be awesome for leaving little notes to each other. I also like that they have so much other color going on in their room.
  

6. To light it up, I would switch out the contractor-grade light fixtures we currently have with something new. There are two in the space currently--one near the washer and dryer and the other between the two doors. 

For the light near the washer & dryer, I want something more practical and utilitarian so I can see what I'm doing as I pre-treat, fold, and iron our clothes.

CB2 Firefly Pendant
This cute pendant from CB2 would be the right mix of whimsy and function. It costs $199.

For the space between the doors, though, I propose installing a crystal chandelier for some bling.
Source
There is a wonderful looking little florist/coffee shop/candy store near our house (in a purple building, no less) that has a few of these hanging from the ceiling. I gush over them all the time and the owner told me a secret. They're from Home Depot; and so is my little beauty above. Best of all: it costs only $99.97. 

I think the curvy lines echo nicely the patterns and swirls in the rug and window treatment, and why not make the laundry room/mudroom pretty? I'm going to be spending at least another 12 years in this room washing leotards and baseball jerseys--and I couldn't be happier about it!

Do you think that laundry rooms and/or mudrooms are the next big thing to renovate (like kitchens and bathrooms were in the last decade)? I definitely think I sense a trend toward it. Let me know in the comments section what you think!


LinkWithin

Related Posts Plugin for WordPress, Blogger...